Domains
A domain is the part of an address after the @. RapidMX accepts mail for a domain only once you have added it in the admin console and proved you own it, and every mailbox and distribution list must use one of your domains. You add your first domain in the setup wizard; come here when your organization gets another name (for example after a rebrand or an acquisition), or when you want a second spelling of your domain to deliver to the same people.
One server can host as many domains as you like. Each one has its own ownership check, its own DKIM key and its own DNS checklist.
Add a domain
- Open Domains and choose + New domain.
- Type the domain in Domain name, for example
example.com. - Leave Alias of at None - a regular domain with mailboxes of its own, unless you're adding an alias domain.
- Choose Create domain. The domain's page opens.
A new domain starts Unverified. Its page shows the ownership record to publish and the full DNS checklist.
On Docker Compose and AWS
- Kubernetes and the single-server installer: a new domain works within seconds, with nothing to restart.
- Docker Compose: also add the domain to
MAIL_DOMAINSin postfix-bridge's.envand restart Postfix. See Docker Compose. - AWS: deploy
ses-bridgeagain for each additional domain. See AWS.
Prove you own it
Until ownership is proved, the domain can't send or receive mail and can't be used for mailboxes.
-
On the domain's page, find the TXT record under Add the following TXT record to example.com to prove ownership, then verify. It looks like this:
Type Name / host Value TXTexample.comrapidmx-domain-verification=<token> -
Add it at your DNS provider. Use the copy buttons beside each value.
-
Choose Verify now.
If the record isn't found yet, the domain stays Unverified and Last checked is updated. DNS changes can take a while to spread, so try again in a few minutes. You don't have to keep pressing the button: RapidMX checks every unverified domain in the background every five minutes and verifies it as soon as the record appears.
Once verified, a domain stays verified. You can remove the TXT record afterwards.
Domains under a reserved top-level domain that can never exist on the public internet (.local, .localhost, .test, .example, .invalid, .internal and .onion) are verified the moment you add them, because there's no public DNS to check. This is meant for internal-only or test installations.
The DNS setup checklist
Below the ownership record, DNS setup checklist lists every record mail for this domain needs, and checks each one live against public DNS every time you open the page.
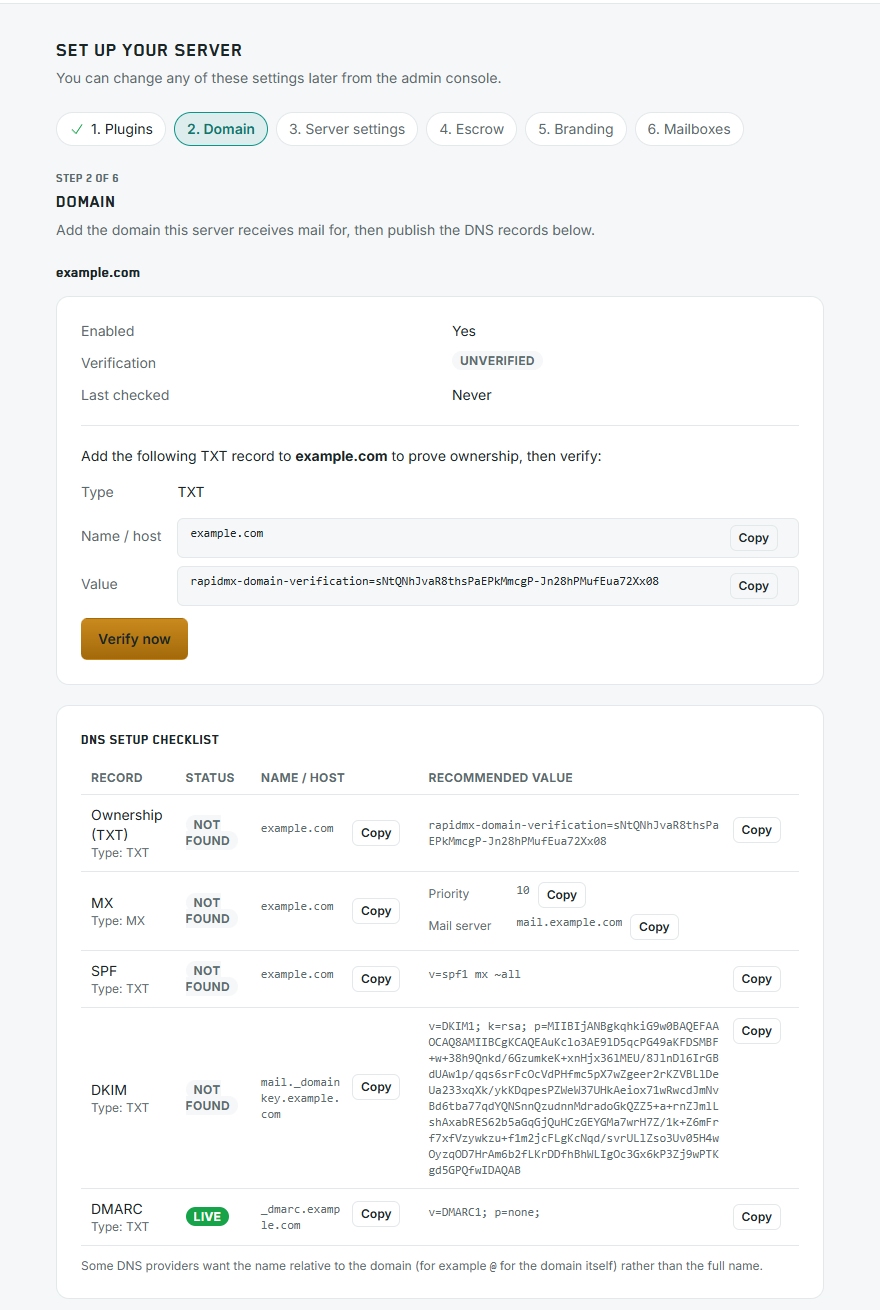
| Record | Name / host | Recommended value | What it does |
|---|---|---|---|
| Ownership (TXT) | example.com | rapidmx-domain-verification=<token> | Proves you own the domain |
| MX | example.com | Priority 10, mail server mail.example.com | Tells other mail servers where to deliver mail for the domain |
| SPF | example.com | v=spf1 mx ~all | Says which servers may send mail as the domain |
| DKIM | <selector>._domainkey.example.com | v=DKIM1; k=rsa; p=<public key> | Publishes the key outgoing mail is signed with |
| DMARC | _dmarc.example.com | v=DMARC1; p=none; | Tells receivers what to do with mail that fails SPF and DKIM |
| Autodiscover (CNAME) | autodiscover.example.com | your server's public host name | Lets Outlook and phones find the server from an address |
| Autodiscover (SRV) | _autodiscover._tcp.example.com | Priority 0, weight 0, port 443, target your server's host name | The same, for clients that look up SRV records |
Each row's Status is one of:
- Live: the record was found with the recommended value.
- Not found: the record is missing, or has a different value.
- Not configured: the server has nothing to recommend for this row yet (for example, no DKIM key exists for the domain, or the server's mail host name isn't set).
Copy the name and value exactly as shown. Some DNS providers want the name relative to the domain (for example @ for the domain itself) rather than the full name.
A few notes on the rows:
- DKIM. The key is generated by the server when you add the domain, so the value is unique to your installation. Outgoing mail is signed with it by Postfix. The selector in the record name is shown on the page.
- DMARC.
p=noneonly monitors. Once you're confident all your mail passes SPF and DKIM, you may want a stricter policy; publish the record you want at your DNS provider. - Autodiscover. These two rows only appear while the Autodiscover plugin is installed. You need one or the other, not both. The CNAME's host name must also be covered by your server's TLS certificate; the SRV record points at a name that already is, so prefer it if a second certificate is hard to get. More on what clients do with these in Automatic setup.
- On AWS, the DKIM and MX records come from
ses-bridgeinstead, so those rows may stay Not found. The ownership record is the one to add here.
The reverse DNS (PTR) record isn't in the checklist, because it belongs to your server's IP address, not to a domain. Set it at your hosting provider.
Alias domains
An alias domain receives mail for the same addresses as another domain, and lets people send as those addresses, without having any mailboxes of its own. For example, if example.org is an alias of example.com, mail to [email protected] arrives in [email protected]'s mailbox, and Jane can send as [email protected].
To make one, choose the main domain under Alias of when you create it, or open an existing domain's page and fill in Alias of under Alias, then choose Save. Leave it blank to turn an alias back into a regular domain.
The rules:
- An alias domain still needs its own ownership record and its own DNS records, and gets its own DKIM key.
- It can only point at a regular domain, not at another alias.
- Mailboxes and distribution lists can't be created on an alias domain.
Delete a domain
Open the domain and choose Delete domain. This can't be undone. A domain that another domain names as its alias can't be deleted until you remove the alias first.
Related
- Before you deploy: the host names and ports your server needs
- Mail transport: Postfix, DKIM signing and TLS between mail servers
- Mailboxes: creating addresses on your domains